Folkstrings.com is reader-supported. When you buy through links on our site, we may earn a small commission.
Tuning a kalimba is an essential skill for ensuring that the melodic tones produced by this traditional African instrument are harmonious and resonate correctly.
As a small, handheld instrument with metal tines that are plucked with the thumbs, a kalimba’s unique sound is a result of the careful balance between the tension on the tines and their length.
Before tuning your kalimba, it’s important to familiarize yourself with its structure and the note layout, which typically follows a specific pattern based on the model.

To start tuning your kalimba, you’ll need a tuning hammer and an electronic tuner or tuning app.
The process involves gently tapping on the ends of the tines to adjust their length. Shortening a tine raises its pitch, while lengthening it lowers the pitch.
Tuning ensures not just the correct pitches, but also improves the overall playability and sound quality.
After tuning, regularly checking and maintaining the tuning can further extend the enjoyment and lifespan of your kalimba, allowing for a consistently joyful playing experience.
Key Points…
- Tuning influences the kalimba’s sound quality and playability.
- An electronic tuner and tuning hammer are necessary for adjusting tine length.
- Regular maintenance keeps the kalimba sounding harmonious.
Understanding Your Kalimba
Before we start tuning, it’s crucial to get familiar with the kalimba and its various types. I’ll walk you through the anatomy of this remarkable instrument, and we’ll explore the different types of kalimbas you might encounter.
Anatomy of a Kalimba
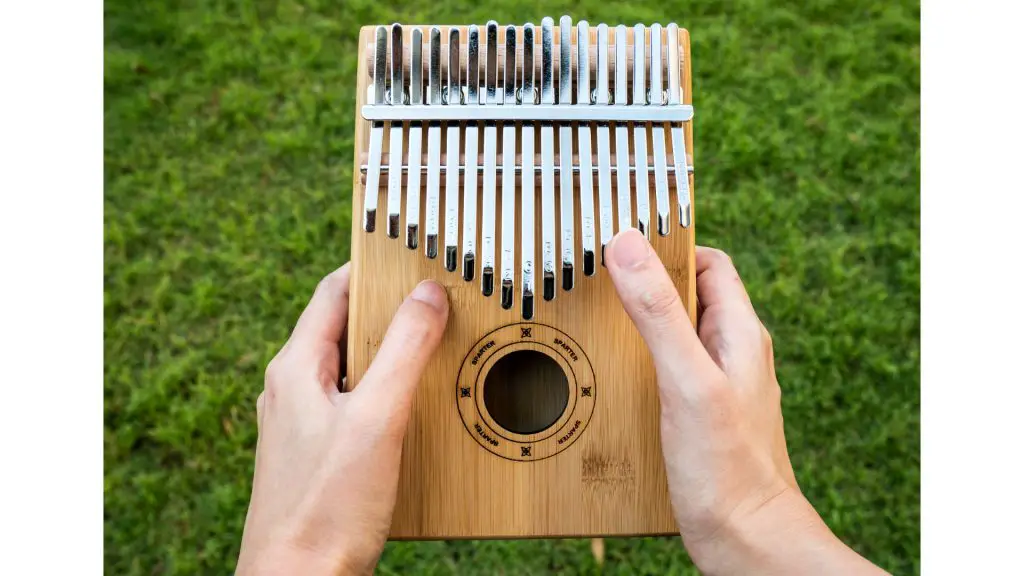
The kalimba, often known as a thumb piano, is a personal and expressive instrument originating from Africa. It consists of a wooden board, which acts as the resonating body. Metal tines of varying lengths are attached to this wood, and these tines are what you pluck to produce sound. The length and thickness of each tine affect the pitch: longer, thinner tines produce lower pitches, while shorter, thicker ones yield higher notes.
- Wooden Board (Body): Typically made from hardwood.
- Metal Tines: Attached to the top of the kalimba, numbering from 5 to 17 or more.
- Bridge: Holds the tines in place and is where tuning adjustments are made.
Types of Kalimbas
Kalimbas can vary significantly depending on their origin and the number of tines they have. The most common type in the Western world is the 17-note kalimba, which is often tuned to the diatonic scale. Hugh Tracey, a significant figure in popularizing the kalimba outside Africa, introduced Hugh Tracey kalimbas that are known for their quality and standard diatonic tuning.
- Pentatonic Tuned Kalimbas: Have five notes per octave, aligning with the pentatonic scale.
- Hugh Tracey Kalimbas: Named after the man who popularized them, these are known for their diatonic tuning and precise craftsmanship.
Pre-Tuning Preparations
Before tuning my kalimba, I ensure I have the necessary tools and know the key my kalimba is intended to be in. This preparation makes the tuning process smoother and helps avoid any potential damage to my instrument.
Gathering the Tools
To successfully tune my kalimba, I gather the following:
- Tuner: I use a digital guitar tuner for accuracy.
- Tuning Hammer: This is specific to the kalimba and fits its tines perfectly.
- Pliers: Sometimes needed to adjust tine length.
- Key Chart: A reference for the correct note for each tine.
I lay out my tools within easy reach on a soft surface to prevent my kalimba from getting scratched.
Identifying the Key of Your Kalimba
Knowing the key is essential to tuning the kalimba correctly:
- I consult the key chart that came with my kalimba; it demonstrates what note each tine should be.
- If I don’t have a physical chart, I often use a digital one from a trusted online source for my specific kalimba type.
- I then compare the intended notes with the current ones using my digital tuner, noting which tines need adjustment. This helps me stay organized and efficient during the tuning process.
Tuning Techniques
When tuning my kalimba, I ensure that each tine produces the correct note and pitch. This process may involve using a tuning app or an electronic tuner, such as Cleartune or even a guitar tuner, to help with accuracy.
Reading Kalimba Tabs
To accurately tune my kalimba, I start by reading kalimba tabs which are musical notations specifically for this instrument. These tabs provide information on what note each tine should produce. Here’s how I approach it:
- Identify the note: Each tab corresponds to a specific tine and indicates the intended note.
- Match the pitch: Using the tabs, I match them against the note produced by my kalimba to assess if tuning is necessary.
Adjusting Tine Position
If a tine on my kalimba is out of tune, here’s what I do to correct it:
- Sharp Notes: For a note that’s too high (sharp), I gently push the tine inwards, towards the bridge of the kalimba, using a tuning hammer. This lengthens the vibrating part of the tine, thus lowering the pitch.
- Flat Notes: Conversely, if a note is too low (flat), I pull the tine outwards. This decreases the length of the vibrating part, thereby raising the pitch.
While tuning, I use an electronic tuner or tuning apps to ensure each tine is tuned to the correct frequency.
I find that precision is key – even small adjustments can make a big difference in sound.
Maintaining The Tune
To keep my kalimba sounding harmonious, I make sure to follow a couple of essential practices. It helps me ensure the instrument remains tuned with accuracy, preventing the notes from becoming sharp or flat.
Regular Tuning Habits
I’ve found that tuning my kalimba on a weekly basis is quite effective in maintaining its sound quality. Here’s how I do it:
- Check every tine: I begin by playing each tine to detect any that sound out of tune, either sharp or flat.
- Use a tuner: I use an electronic tuner for precision, making sure each tine is tuned to the correct note.
- Adjust tines gently: I use the tuning hammer to gently tap the tines in or out. Pushing them in lowers the pitch (flatter), while pulling them out raises it (sharper).
- Retest: After adjustments, I play the tines again, checking the accuracy with the tuner.
Dealing with Common Tuning Issues
Occasionally, I run into some common issues like a buzzing tine. Here’s how I handle them:
- Identify the buzz: I locate the source of the buzz by playing each tine individually.
- Reshape the tine: If a tine is buzzing, I check its shape. A slight bend can cause buzzing, so I carefully realign it using pliers.
- Check the gaps: I ensure there’s enough space between tines. Tines that are too close might buzz against each other.
- Examine the bridge: Sometimes, the problem is at the bridge. I confirm that the tine rests correctly, and the screws are tight.
Playing Your Tuned Kalimba
Now that my kalimba is in tune, I can begin to explore its musical possibilities. I’ll start by familiarizing myself with simple songs and scales before moving on to more complex chords and melodies.
Simple Songs and Scales
I always start playing simple songs to get accustomed to my kalimba’s layout and sound. “Twinkle Twinkle Little Star” is a perfect starting point.
Here’s how to play the C major scale on kalimba:
- C – Start with the left thumb on the lowest tine.
- D – Move to the next tine with the right thumb.
- E – Left thumb goes to the next tine.
- F – Right thumb again.
- G – Left thumb jumps in.
- A – Right thumb’s turn.
- B – Left thumb once more.
- C – Right thumb hits the highest tine of the scale.
Mastering the scales is essential to navigate the kalimba and perform melodies effortlessly.
Advancing with Chords and Melodies
Once comfortable with simple songs, I incorporate chords into my playing. Chords add richness and depth to the melodies.
Here’s a basic chord on the kalimba:
- C Major Chord: C (root) – E (major third) – G (perfect fifth)
To play the C major chord, I use my left thumb for the root note (C) and alternate with my right thumb to play E and G in sequence.
By practicing chords, I can begin to play more complex songs and enrich my melodies with harmonious sounds.
Frequently Asked Questions
Tuning a kalimba can be a delightful process, especially knowing you’re personalizing your instrument to your preferred sound. Let’s tackle some common questions to help you tune your kalimba correctly.
What tools do I need to tune my 17 key kalimba?
Can I tune my 8 key kalimba without professional help?
Is there a specific method to easily tune my kalimba for the first time?
Are there any reliable apps to help with tuning my kalimba to the correct notes?
How can I use a guitar tuner to properly set up my kalimba?
What steps should I follow to tune my kalimba to F major?
Author Profile
-
Daniel Johnstone is an English writer with a love for stringed instruments from around the world.
He shares his love for these instruments through his writing for folkstrings.com, a website dedicated to all things related to folk string music.
Daniel's passion for music started at a young age, and he has since become an accomplished musician, playing guitar, cavaco, and recently, the harp.
His dedication to learning and sharing his knowledge of stringed instruments is evident in his insightful and engaging blog posts. Whether you're a seasoned musician or a beginner, Daniel's writing is sure to inspire and entertain you.
When he's not playing music or writing, you can find Daniel exploring new instruments and seeking out new sounds to share with his readers.
Latest entries
 AutoharpApril 4, 2024Is Autoharp Easy to Play? Unveiling the Truth for Beginners
 AutoharpApril 4, 2024What Is an Autoharp Worth? Your Guide to Pricing and Value
 AutoharpApril 4, 2024Where Is the Best Place to Buy an Autoharp? Your Top Picks Reviewed
 AutoharpApril 4, 2024How Does the Autoharp Work? – Unveiling Its Melodic Secrets


