Mountain Dulcimer Chords For Beginners
Folkstrings.com is reader-supported. When you buy through links on our site, we may earn a small commission.
Last Updated on June 8, 2026 by folkstrings
Learning your first mountain dulcimer chords is one of those moments where everything clicks.
The instrument suddenly goes from a drone-based melody machine to something that can fill a room with full, warm harmony.
The good news is that you only need a handful of chord shapes to start playing real songs, and the dulcimer’s layout makes many of those shapes surprisingly simple to find.
Most beginners start in DAD tuning, which is the most common setup for a mountain dulcimer.
That tuning gives you a built-in advantage: several chords need only one or two fingers, and some sound great with all open strings.
You do not need to memorize dozens of shapes before you can accompany a song.
This guide walks you through the core chord shapes, how to read a chord chart, why tuning matters, and how to connect all of it to actual practice.
Take it one section at a time, and you will be strumming real chord progressions faster than you expect.
Start With The Most Useful Beginner Shapes
In DAD tuning, your first priority is nailing the D, G, and A major chords, along with their common minor relatives.
Adding a seventh chord or two after that gives you enough vocabulary to play most folk, bluegrass, and simple pop songs.
Essential Chords In DAD Tuning
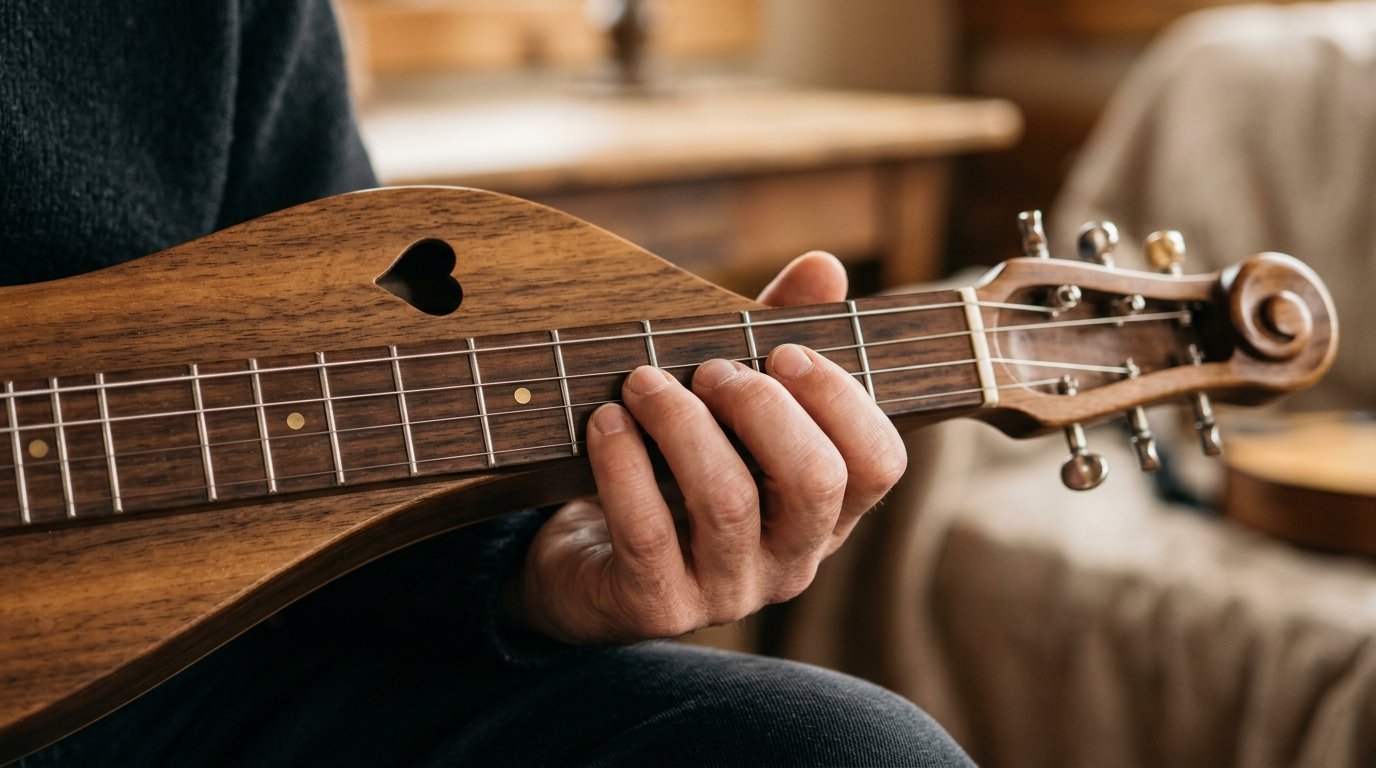
DAD tuning means your bass string, middle string, and melody string are tuned to D, A, and D respectively.
Because of this layout, a D major chord is actually your open strings, with no fingers needed at all.
Strum everything open and you are already playing a chord.
For G major, you typically place one finger on the third fret of the melody string while leaving the other strings open or lightly fretted.
A major usually sits around the fourth fret area on the melody string, with the middle string fretted to match.
These three chords, D, G, and A, are the backbone of dozens of songs in the key of D.
Spend the most time here first.
Easy Major And Minor Moves
Once your major shapes feel steady, minor chords are not far away.
The key change is usually just shifting one finger by a single fret.
For example, moving from A major to A minor often means lowering one fret position on the melody string.
Think of major as bright and open, and minor as slightly darker.
Your ear will confirm when you have it right.
Trust what you hear, not just what the chart tells you.
Bm and Em are the minor chords you will use most often in DAD tuning.
They take a bit more finger coordination, but they are worth learning early because they show up constantly in songs.
When To Use Seventh Chords
A seventh chord adds one extra note on top of a major chord.
It creates a slightly tense, unresolved sound that pulls naturally toward the next chord in a progression.
In practice, you will use A7 most often, right before resolving back to D major.
The fingering for A7 in DAD tuning is simpler than it sounds on paper: it often requires only one or two fretted notes.
Try playing D, then A7, then back to D.
That small loop is one of the most satisfying beginner progressions on the dulcimer.
Quick Reference: Essential Chord Shapes In DAD Tuning
Before getting into how to read chord charts, here are the shapes you actually need. Two approaches suit different playing styles.
Noting style (melody string only)
The simplest beginner approach. Press only the melody string at the fret shown and let the bass and middle strings ring open as drones. This is how most players start, and it works for hundreds of songs.
| Chord | Melody string fret | Role in key of D |
|---|---|---|
| D | 0 (open) | Home chord (I) |
| Em | 1 | Passing minor (ii) |
| G | 3 | IV chord |
| A | 4 | V chord |
| Bm | 5 | Relative minor (vi) |
Full 3-string chord shapes
When you are ready to fret all three strings, these are the four shapes that cover most folk and traditional songs in DAD tuning. 0 means that string rings open.
| Chord | Bass string | Middle string | Melody string |
|---|---|---|---|
| D (open) | 0 | 0 | 0 |
| D (with 3rd) | 0 | 0 | 2 |
| G | 0 | 1 | 3 |
| A | 4 | 2 | 4 |
D open is your starting point — strum everything with no fingers down. G adds one finger to the middle string at fret 1 and one to the melody at fret 3. A uses three fingers but follows a symmetrical pattern: bass and melody both at fret 4, middle at fret 2.
How To Read A Chord Chart Correctly
A dulcimer chord chart shows you exactly where to place your fingers on the fretboard, but only if you know how to read the diagram orientation and what each symbol means.
Once you crack that code, any mountain dulcimer chord chart or mountain dulcimer chord chart PDF becomes immediately useful.
Understanding Strings And Diagram Orientation
Most dulcimer chord charts are drawn as a vertical grid.
The vertical lines represent the strings, and the horizontal lines represent the frets.
The bass string is usually shown on the left, and the melody string is on the right.
This orientation can feel backwards at first, especially if you are used to guitar chord diagrams.
Take a moment before each practice session to remind yourself which string is which on your actual instrument, then match it to the chart.
Some charts flip this orientation or show the strings from a player’s-eye view.
Always check the chart’s key or legend before assuming.
Open Notes, Dots, And Fret Numbers
A dot on the chart marks where you press a finger.
If the dot is on the third horizontal line, you press that fret on that string.
A zero above a string means it is played open, with no finger on it.
Some charts use numbers instead of dots.
The number tells you which fret to press.
For example, a 3 on the melody string column means press the third fret on that string.
An X above a string means you mute it or do not play it at all.
On a dulcimer you rarely see this, since most chord shapes use all three strings.
Using Printable And Blank Diagrams
A printable mountain dulcimer chord chart PDF is a practical tool to keep on your music stand.
You can mark your most-used chords, circle the shapes that need more work, and cross off chords you have mastered.
Blank chord diagrams are grids with no dots filled in.
These let you sketch out new chord shapes you find or create your own reference sheet.
Drawing a shape by hand helps it stick in your memory faster than just reading it from a book.
Keep a small stack of blank diagrams nearby during practice.
When you find a chord position that sounds right, write it down immediately.
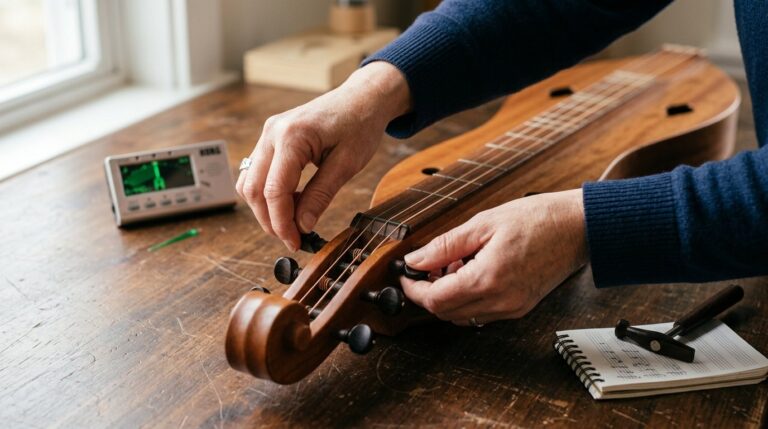
Why Tuning Changes Everything
The chord shapes you learn in one dulcimer tuning will not automatically transfer to another.
Changing a single string’s pitch shifts every chord fingering built around it, which is why DAD, DAA, and DAC each have their own dedicated chord charts.
What DAD Means On The Strings
DAD is the most widely used dulcimer tuning in the United States.
Your bass string is D, your middle string is A, and your melody string is D.
This gives the instrument a rich, full sound with built-in drone quality.
Because the bass and melody strings share the same pitch, many chord shapes feel balanced and easy to hear in tune.
Most beginner resources, songs, and charts are written for DAD, so starting here gives you the widest access to learning materials.
The melody string carries most of your chord movement.
The bass string often acts as an anchor, reinforcing the D root note underneath.
How DAA Simplifies Some Songs
In DAA tuning, you retune the melody string down from D to A, matching the middle string.
This creates a slightly brighter sound in higher registers and works well for certain traditional melodies.
Some players find DAA easier for songs that spend a lot of time on the A note, because open strings ring naturally in tune with the melody.
The chord shapes shift compared to DAD, so you will need a separate chord chart specifically made for DAA.
Do not assume a DAD chord shape will sound correct in DAA.
Check the chart for the tuning you are actually using.
What To Expect In DAC
DAC tuning raises the melody string to C instead of D or A.
This creates a minor-key feel from the very start, making it popular for modal and minor-key songs.
The chord relationships in DAC are different enough that beginner chord charts for DAD will not apply here at all.
If you try DAC, look specifically for a DAC chord chart or a chart labeled for that tuning.
Most beginners are best served by staying in DAD until chord shapes feel natural.
Explore DAA and DAC once you have a solid foundation.
Simple Theory That Makes Chords Easier
You do not need to know music theory deeply to play dulcimer chords, but knowing how a major triad is built helps you find new chord shapes on your own.
Three ingredients make up every major chord: a root note, a major third, and a perfect fifth.
Building A Major Triad
A major triad is just three notes stacked together in a specific way.
Start on any note, call it the root.
Add a major third above it, then add a perfect fifth above the root.
Those three notes together make a major chord.
On the dulcimer in DAD tuning, the D major chord works because the open strings naturally produce a D major triad.
Your bass string gives you the root D, the middle string gives you A (the perfect fifth), and the melody string gives you another D.
Knowing this lets you check your chord shapes.
If the notes on your strings match the root, third, and fifth of the chord you want, you are playing it correctly.
Hearing The Major Third And Minor Third
The major third is the interval that gives a major chord its bright, happy quality.
On a piano, it would be four half-steps above the root.
On your dulcimer, you can hear it as the note that sounds “open” and settled in a major chord.
A minor third is only three half-steps above the root, and it gives minor chords their darker tone.
When you shift one finger one fret lower on certain chord shapes, you are often changing a major third to a minor third, which turns a major chord into a minor one.
Your ear is a great teacher here.
Play a major chord, then lower one finger one fret and listen to the difference.
Finding The Perfect Fifth On The Neck
The perfect fifth is two notes that sound very stable and full together.
It is seven half-steps above the root.
On the dulcimer in DAD tuning, A is the perfect fifth of D, which is why the middle string sounds so consonant when left open under a D melody.
Once you can identify the perfect fifth by ear, you can check whether a chord shape is in tune or slightly off.
If something sounds hollow or wrong in a chord, the fifth is often the note to examine first.
This knowledge also helps when you start building chords in new keys or exploring movable shapes further up the neck.
Finding Shapes On The Fretboard
The dulcimer fretboard is more logical than it looks at first glance.
Once you spot a few patterns, you can find chord shapes without needing to memorize each one separately.
Chord fingerings often repeat at different positions, and the melody string usually tells you the most about which chord you are playing.
Recognizing Repeatable Patterns
Many chord shapes on the dulcimer move as a unit. If a shape works at the third fret, the same relative finger arrangement might produce a different but equally useful chord at the fifth fret.
These are called movable shapes. In DAD tuning, you will notice that shapes using two fretted notes often follow predictable spacing.
When you find a chord that sounds right, try sliding the same hand position up or down the neck and listen to what changes.
Write down the fret positions every time you discover a shape that works.
Your future self will thank you for keeping those notes.
Matching Chords To Melody Notes
The melody string is your guide. Whatever note the melody lands on often determines which chord sounds best underneath it.
If your melody sits on D, a D major or D minor chord typically fits. If it lands on A, an A major or A7 chord usually works.
Start with simple songs where the melody stays on just two or three notes.
Find the chord that matches each landing point, and you have a basic accompaniment.
Choosing Comfortable Finger Placements
Not every chord voicing in a chart will feel natural in your hand. Two different fingerings can produce the same chord but feel very different to play.
Always try both options when a chart shows alternates. For the bass string, your thumb or first finger often works best depending on how you hold the instrument.
Keep your fretting hand relaxed, with your thumb resting gently on the back of the neck rather than gripping hard. If a chord shape causes tension or pain, stop and adjust.
A slightly different angle or finger assignment often resolves the problem without changing the chord at all.
Practice Tools For Playing Real Songs
Getting from isolated chord shapes to actual songs requires a few simple tools and a consistent routine.
Pairing a mountain dulcimer chord chart PDF with dulcimer tabs gives you both the shape reference and the timing information you need to play a complete piece.
Using Chord Charts Alongside Tabs
Dulcimer tabs show you which frets to press on each string, presented in a time-ordered sequence.
A chord chart, on the other hand, shows you shapes without telling you when to play them.
Use both together. Let the tab give you the melody line and the timing, and keep your chord chart nearby to reference the correct finger position for each chord symbol above the staff.
This combination answers both “what shape?” and “when do I play it?” Many free beginner tab resources already include chord symbols written above the melody.
Cross-reference those symbols with your chord chart until the shape becomes automatic.
Creating A Personal Reference Sheet
Your own handwritten reference sheet is more useful than any printed resource, because it only contains the chords you actually use.
Start with your five or six most-needed shapes: D, G, A, Bm, Em, and A7 in DAD tuning are a strong starting set.
Draw or print blank chord diagrams and fill in your most-used shapes. Add a short note beside each one, such as “open D” or “one finger, third fret.”
These notes act as quick memory prompts when you are mid-song and need to recall a shape fast.
Review this sheet at the start of every practice session. Familiarity with the page layout alone speeds up your recall.
Moving From Practice To Accompaniment
Playing chords alone in practice is different from playing them alongside a melody or another musician.
The biggest shift is timing: you need to change shapes smoothly and land on each chord at the right moment, not after it.
Start by practicing slow chord changes in isolation.
Set a steady beat, count four counts per chord, and switch without stopping the rhythm.
Speed is not the goal yet; clean, on-time changes are.
Once you can change chords without breaking rhythm, try strumming along to a simple song recording at reduced speed.
Author Profile
- Daniel Johnstone is an English writer and folk musician who has been playing stringed instruments for over twenty years. He started on guitar as a teenager before working his way through cavaco, tenor guitar, autoharp, mountain dulcimer, and harp. He founded Folkstrings.com to provide practical, experience-based buying advice for folk instrument players at every level — the kind of guidance he always wished had existed when he was finding his feet.
Latest entries
 AsianJune 21, 2026What Is the Sarod Instrument?
 ViolinJune 21, 2026How Hard Is It to Learn the Violin?
 ViolinJune 21, 2026Is Violin Harder Than Guitar?
 OudJune 21, 2026How Hard Is It to Play the Oud?