How to Play the Kalimba for Beginners: First Steps
Folkstrings.com is reader-supported. When you buy through links on our site, we may earn a small commission.
Last Updated on June 16, 2026 by folkstrings
The kalimba is honestly one of the friendliest instruments I’ve ever picked up. It fits right in my hands and makes beautiful sounds almost instantly.
I didn’t need any music experience to start playing real melodies on day one. If you just got your first kalimba and aren’t sure where to begin, you’re in the right place.

The kalimba is a modern take on the mbira, a traditional African thumb piano that’s been around for centuries. Today’s version, usually called a thumb piano or just a kalimba, most often comes in a 17-key model tuned to C major.
That’s actually perfect for beginners, since most easy tabs and songs are written for that exact setup. You can jump right in.
The fastest way to get going: learn the note layout first, get a relaxed plucking motion with your thumbs, and start playing simple songs using numbered tabs. Each step builds on the last, and you don’t need to read sheet music or know music theory at all.
Key Takeaways
- The 17-key C major kalimba layout alternates notes left and right from a center tine, so your thumbs naturally share the work.
- Clean tone comes from a relaxed grip and a smooth plucking motion, not from pressing hard or moving fast.
- Kalimba tabs use numbers that match the tines directly, so you can start playing songs without any music theory background.
Know Your Kalimba Layout First
Before I played a single note, I took a minute to look at the layout. The notes on a 17-key kalimba don’t run left to right like piano keys, which surprises almost every beginner.
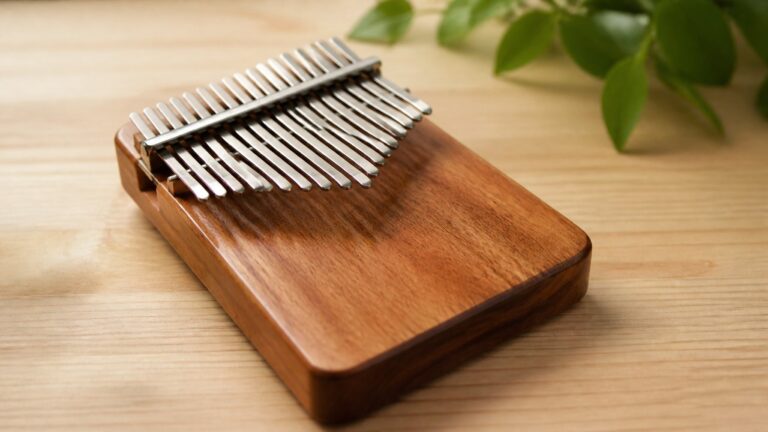
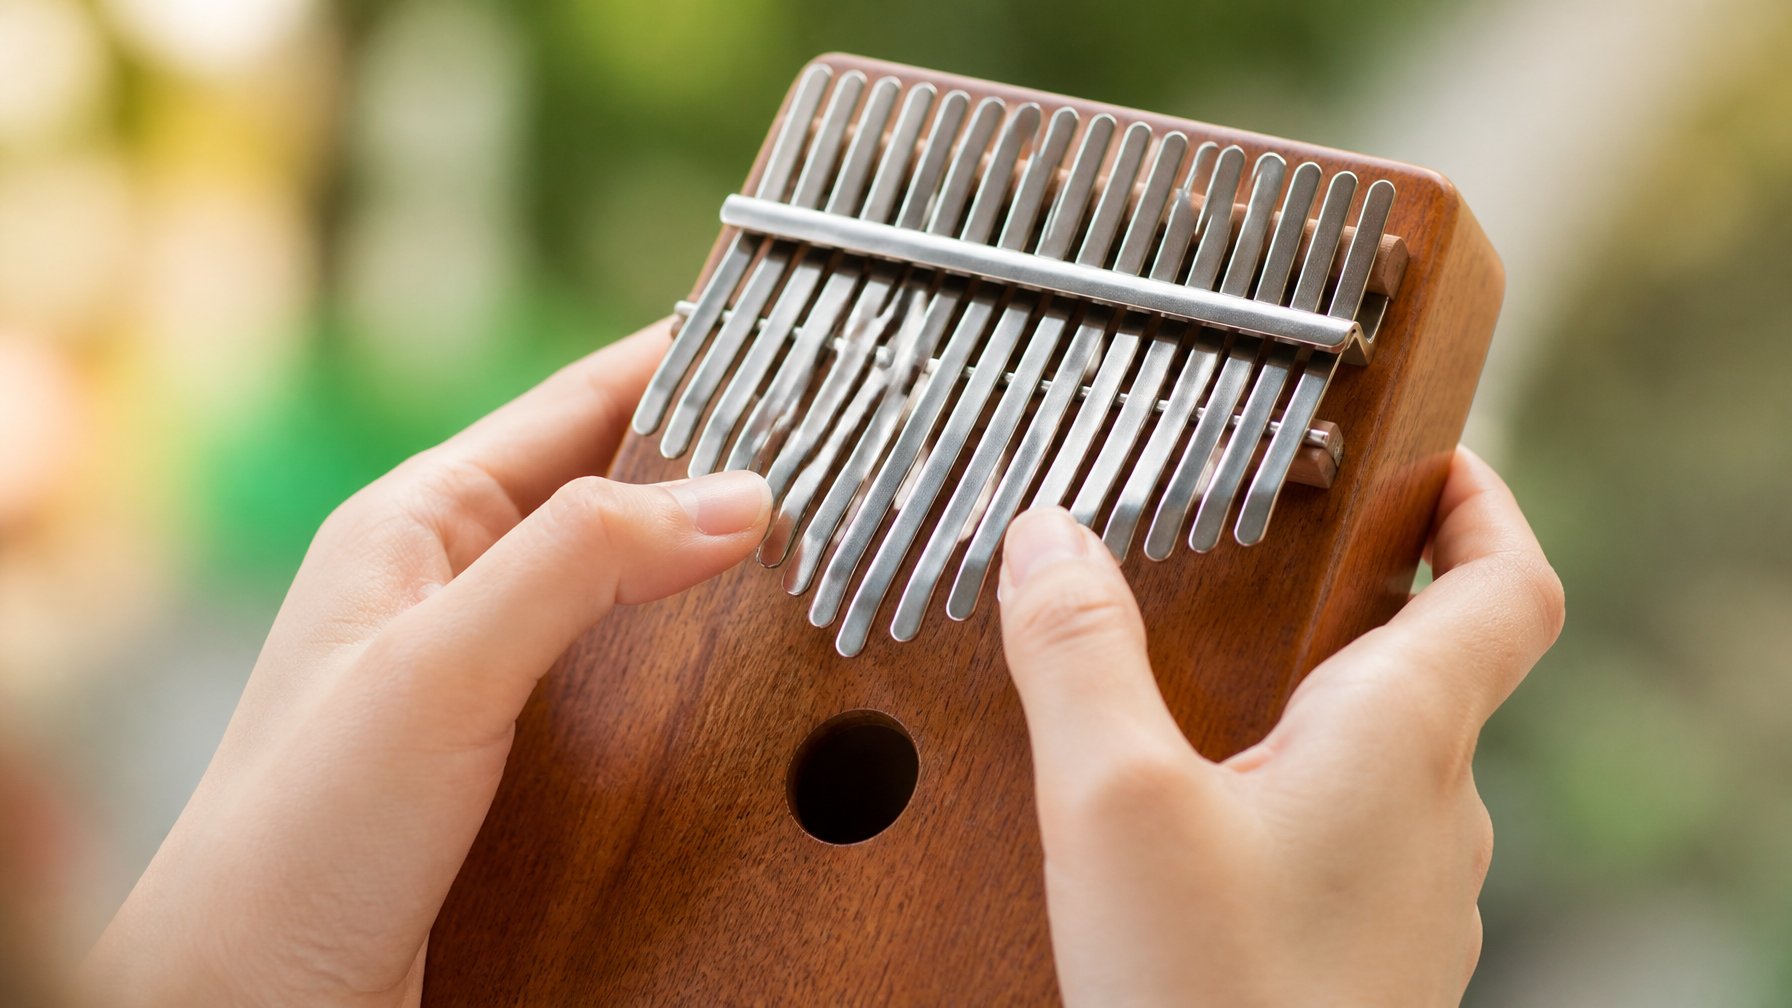
How A 17-Key Kalimba Is Arranged
A standard 17-key kalimba has tines of different lengths arranged in a fan shape. The shortest tines in the middle play the highest notes.
The longer tines on the outside edges play lower notes. Here’s the part that trips people up: the notes don’t go in order from left to right.
Instead, they alternate—one note on the right, next on the left, then back to the right. It’s a little weird at first.
But honestly, this alternating layout is a feature, not a flaw. Both thumbs stay active and share the melody naturally.
Once I got used to it, the back-and-forth motion started to feel intuitive. It’s actually kind of fun.
Finding The Center Tine
The center tine is your anchor point. On a standard beginner kalimba in C major, the center tine is C5—the middle C of that octave.
It’s usually the tallest tine sitting right in the middle, and lots of kalimbas have it marked or labeled. I always tell new players to find that center tine before anything else.
Touch it, pluck it, listen to it. Every other note radiates outward from that one tine, so knowing where it is makes the whole layout click faster.
Understanding Kalimba Notes In C Major
The 17-key kalimba in C major covers a range of notes across about two and a half octaves. Starting from the center tine and moving outward, the notes climb in pitch on both sides in that alternating pattern.
The left side generally holds notes just below each right-side note in the scale. For beginners, here’s the practical takeaway: most easy songs stay near the center of the instrument.
You don’t need to reach for the outer tines right away. Staying close to the middle keeps your thumbs relaxed and the learning curve manageable.
Hold It Properly And Make A Clean Sound
Getting a clean, ringing tone really comes down to how relaxed your hands are and how you touch the tines. The two biggest fixes for most beginners: loosen your grip and adjust your thumb position.
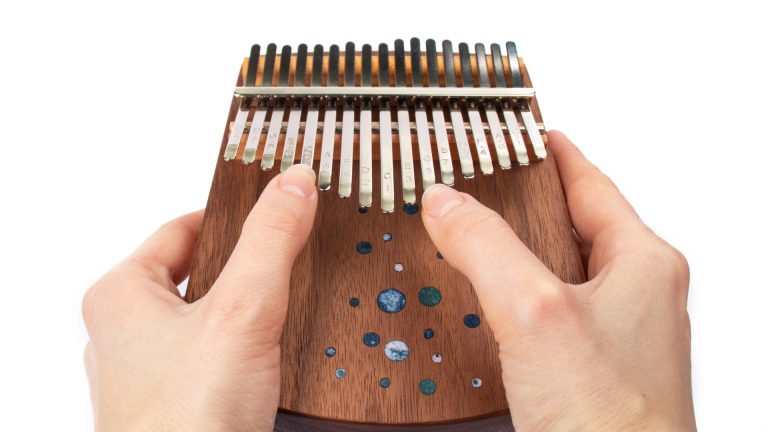
Hand Position And Thumb Placement
Hold the kalimba with both hands, wrapping your fingers gently around the sides of the body. Your thumbs should hover naturally above the tines—don’t press down hard.
Think of cradling the instrument, not gripping it. Keep your wrists slightly raised, too.
If your wrists are too flat or your thumbs are reaching awkwardly, tension builds up and your tone suffers. The kalimba should feel balanced and almost effortless to hold.
Plucking The Tines Without Buzzing
The motion for a clean note is a gentle downward press with a quick release, almost like a tiny flick. The tine needs to spring back freely so it can ring out fully.
If you push and hold, you’ll mute the note before it can sustain. Buzzing usually means either a tine is a little loose at the bridge, or my thumb is catching the tine on the way back up.
A light, confident pluck almost always clears up the buzz. The fleshy pad just below my thumbnail gives a warm, round tone, while using the nail gives a brighter, more percussive sound.
I prefer the pad for melodies, but both work. Try both and see what you like.
Using Alternating Thumbs For Smooth Playing
Since the kalimba’s notes alternate sides, the natural motion is to alternate thumbs—left thumb for a note on the left, right thumb for a note on the right. This keeps both hands involved and prevents one thumb from doing all the work.
When I practice a new melody, I go slow enough to let each thumb land cleanly before the next one moves. Rushing through alternating thumbs leads to sloppy notes.
Slow and deliberate early on really builds the muscle memory you’ll need for faster, smoother playing later. Trust me, it’s worth the patience.
Tune The Instrument Before You Practice
Kalimba tuning is something beginners often skip, but practicing on an out-of-tune instrument will train your ear in the wrong direction right from the start. A quick tuning check before each session takes less than two minutes and makes a real difference in how your playing sounds.
When Kalimba Tuning Is Necessary
A new kalimba might arrive a little out of tune from shipping or temperature changes. Even after you set it up, tines drift over time.
Humidity, temperature, or accidental bumps can push notes sharp or flat. I check my kalimba’s tuning at least once a week.
If it sounds slightly “off” or melodies feel wrong even when I’m hitting the right tines, it’s usually out of tune. Don’t ignore that feeling.
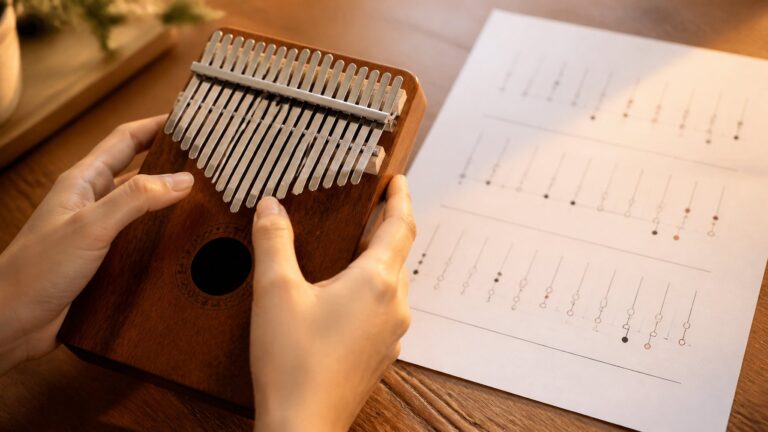
How To Use A Tuner And Key Chart
A free tuner app on your phone works perfectly. I open the app, pluck one tine at a time, and watch the display to see if each note is sharp, flat, or in tune.
A key chart for a 17-key C major kalimba shows which note each tine should be, starting from the center C5 and working outward. Going through all 17 tines takes just a few minutes.
I work from the center outward, not side to side, since the center tines get used most in beginner songs. It’s a habit that saves time.
Adjusting Tines With A Tuning Hammer
A kalimba tuning hammer is a small mallet that comes with most instruments. Tapping the base of a tine gently downward makes it longer and lowers the pitch.
Tapping the tip upward shortens it and raises the pitch. The key word here is gently—tiny adjustments move the pitch more than you’d expect.
I make a small tap, check the tuner, and repeat until the note lands where it should. Rushing this step is easy, but patience really pays off.
Read Tabs And Find Notes Quickly
Kalimba tabs are the shortcut that make this instrument so beginner-friendly. Instead of reading sheet music, I follow simple numbers that match directly to the tines on my instrument.
How Kalimba Tabs Work
A kalimba tab uses numbers to represent each tine. The center tine is usually labeled 1, and the numbers go up as you move outward to higher notes.
When a tab shows the number 1, I pluck the center tine. When it shows 5, I count out to the fifth tine.
Numbers are read from bottom to top on a tab chart, kind of like reading a melody from left to right in time. Some tabs use arrows or bold numbers for rhythm or emphasis, but for basic beginner songs, a plain numbered sequence is all you need.
Matching Tabs To The Note Layout
The most useful thing I did early on was hold my kalimba and match each number from a tab to the actual tines. Doing it physically, instead of just reading about it, really locked in the connection between the number and the tine under my thumb.
On a C major kalimba tab, the numbers match the scale degrees: 1 is C, 2 is D, 3 is E, and so on. Once I knew that, familiar melodies became recognizable in the tab format almost instantly.
Moving From Single Notes To Simple Chords
Once single notes feel comfortable, two numbers stacked on top of each other in a tab mean a chord: two tines played at the same time. I use both thumbs together to pluck the two tines.
Starter chords are often pairs like 1 and 3 together, or 5 and 8. They sound full and satisfying without needing much extra coordination.
I recommend holding off on chords until single note melodies feel natural, then experimenting with simple two-note pairs at the end of phrases.
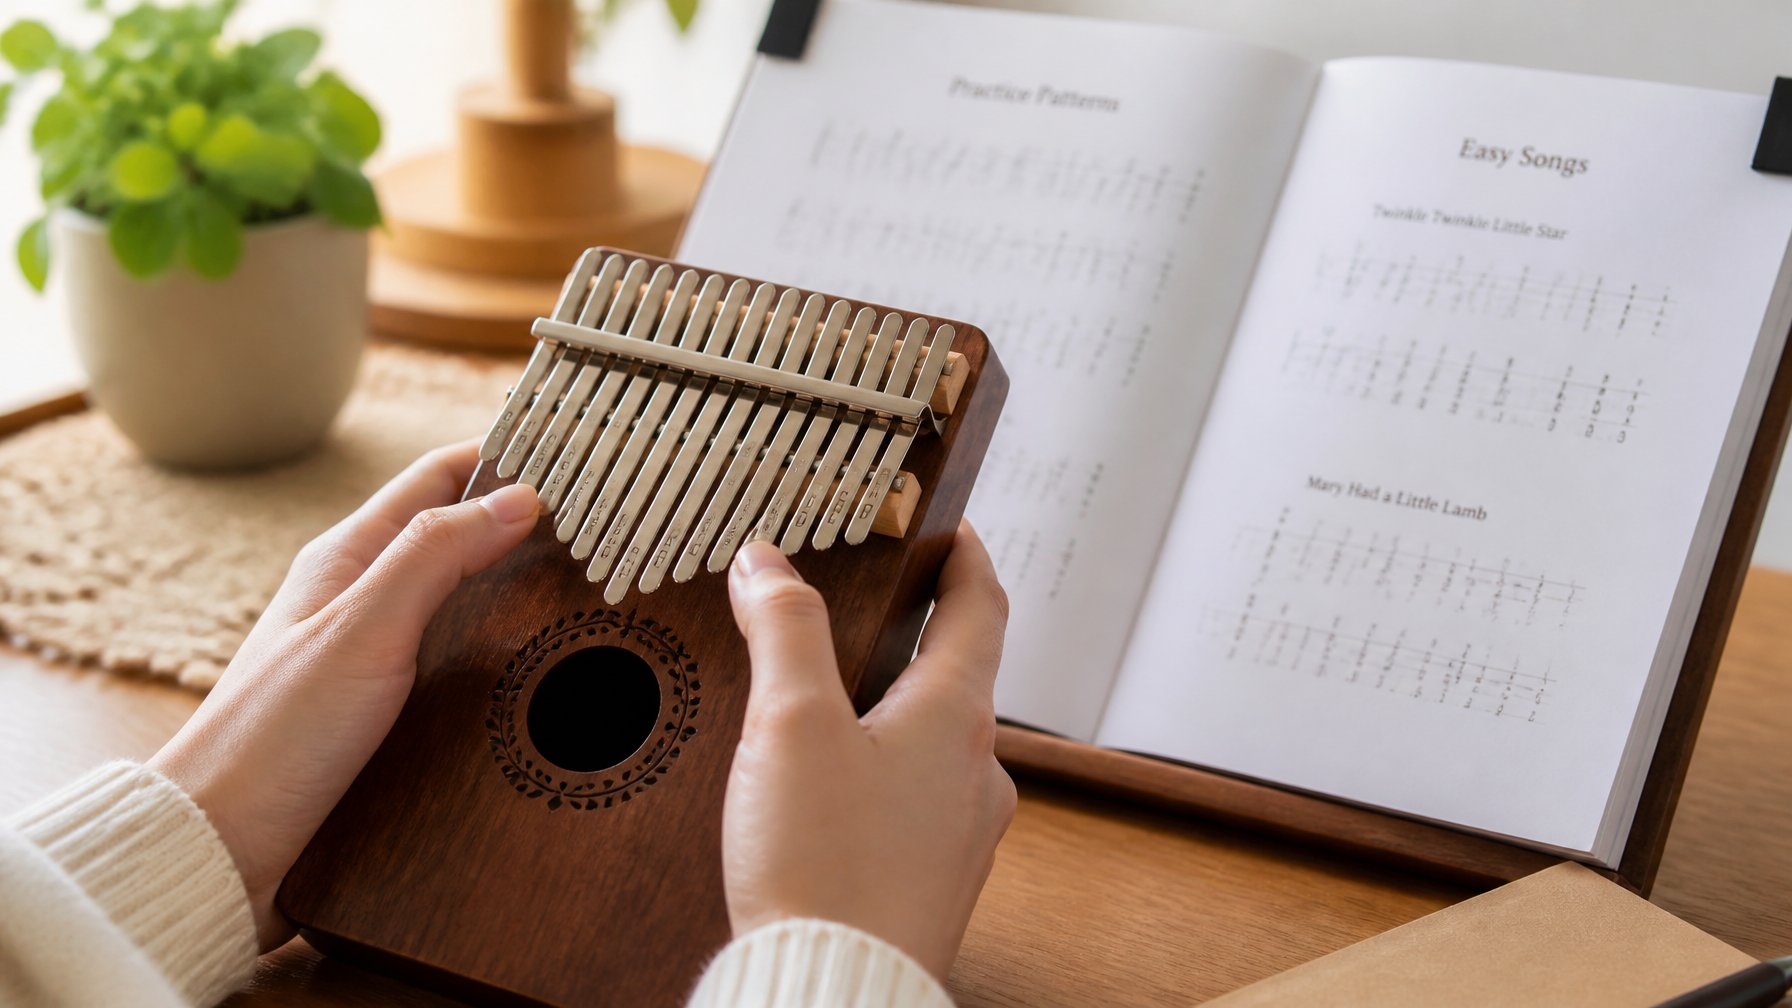
Start With Simple Practice Patterns And Songs
The fastest way to build real confidence on kalimba is to finish things. Short, simple songs give me that sense of completion early, which keeps the whole process enjoyable rather than frustrating.
Your First Scale And Repetition Drills
Before I jump into songs, I like to spend a few minutes playing the C major scale up and down the tines. I start at the center tine and work outward to the right, then back in. This helps my thumbs get used to alternating and lets me memorize where each note sits.
I practice short repetition drills, too. I’ll pluck the same tine five times as cleanly as I can, then move to the next one. That’s how I build control and consistency before I try to play a real melody.
Easy Kalimba Songs For Absolute Beginners
Here are the kalimba songs I usually recommend starting with, from the simplest up:
- Hot Cross Buns: Just three notes. Honestly, this is the easiest way to get a feel for the instrument.
- Mary Had a Little Lamb: Four notes and a simple back-and-forth pattern. It’s great for building thumb coordination.
- Twinkle Twinkle Little Star: Six notes, clear structure. Most beginners finish this one and feel genuinely proud.
- Ode to Joy: A longer melody that helps you practice playing through whole phrases.
- Stand By Me: A familiar pop melody with slightly wider jumps between tines.
You can find free kalimba tabs for all of these. They use simple numbers and work with a standard 17-key C major kalimba.
How To Practice Without Feeling Stuck
If a section of a song feels tough, I break it down. I’ll loop just the tricky four or five notes until it feels smooth, then connect it to the phrase before. This way, I make progress without replaying the whole song every time.
Short daily sessions—10 to 15 minutes—work better than one long practice once a week. My thumbs learn the movements through regular repetition, and honestly, consistency beats marathon sessions every time.
If you’re just starting out, it’s worth reading my guide on what a kalimba is first. Once you’re comfortable with the basics of playing, the logical next step is learning how to read kalimba tabs so you can follow along with songs.
Frequently Asked Questions

What size and type of kalimba should I choose for my first instrument?
Go for a 17-key kalimba tuned to C major. It’s the easiest for beginners, with the widest range of tabs and songs online. The C major layout is intuitive, even if you don’t know music theory. Both flat board and box-style bodies work, but the box resonates a bit louder if you want more volume.
How do I hold the kalimba comfortably and use my thumbs without strain?
Wrap your fingers around both sides of the body and let your thumbs rest above the tines—don’t press down. Keep your grip loose, wrists slightly raised. If your thumbs start to feel sore, take a quick break and shake out your hands before playing more.
How can I tune my kalimba at home, and what tools do I need?
You’ll need a free tuner app on your phone and the little tuning hammer most kalimbas come with. Pluck each tine, check the tuner against a C major chart, and tap the base down to lower the pitch or the tip up to raise it. Go slow—small taps, check after each adjustment.
What do the numbered notes or tabs mean, and how do I read them?
Each number in a kalimba tab matches a specific tine. The center tine is usually labeled 1, and numbers go up as you move outward to higher notes. Read the numbers bottom to top, plucking each tine as you go. If numbers are stacked, play those tines at the same time.
What are some easy songs or practice exercises I can start with?
Hot Cross Buns is the absolute easiest—just three notes. After that, Mary Had a Little Lamb and Twinkle Twinkle Little Star are perfect next steps. For exercises, running the C major scale up and down with alternating thumbs makes a great daily warmup for technique and note memory.
How can I keep my playing smooth and stop buzzing or muted notes?
Buzzing tends to happen when a tine gets loose at the bridge. Sometimes, it’s just your thumb catching the tine on the way back.
Try a clean, confident pluck and let the tine spring back on its own. That almost always does the trick.
If your notes sound muted, you might be holding the tine down too long. Release it right after you pluck, and you’ll hear the difference.
Author Profile
- Daniel Johnstone is an English writer and folk musician who has been playing stringed instruments for over twenty years. He started on guitar as a teenager before working his way through cavaco, tenor guitar, autoharp, mountain dulcimer, and harp. He founded Folkstrings.com to provide practical, experience-based buying advice for folk instrument players at every level — the kind of guidance he always wished had existed when he was finding his feet.
Latest entries
 AsianJune 21, 2026What Is the Sarod Instrument?
 ViolinJune 21, 2026How Hard Is It to Learn the Violin?
 ViolinJune 21, 2026Is Violin Harder Than Guitar?
 OudJune 21, 2026How Hard Is It to Play the Oud?